Description
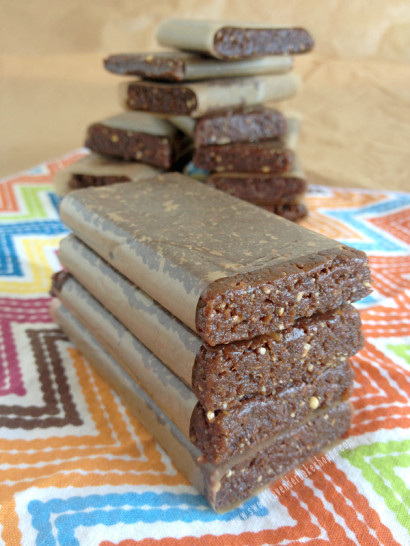
I don’t know if your husband is anything like my husband, but if he could, he would bankrupt us with his love of the Peanut Butter Chocolate Chip Larabars. So an idea was born. I’m going to replicate that yummy recipe and make them (with love) for him to snack on whenever he wants (for a way better price)!
Ingredients
- ½ cups Unsalted Roasted Peanuts (50% Less Salt Roasted Is Fine As Well)
- 1 pound (1 Pound Is About 30) Medjool Dates, Pitted
- 1 Tablespoon Unsweetened Cocoa Powder
- 1 teaspoon Coconut Oil
- 1 teaspoon Peanut Butter
- ½ cups Dark Chocolate Chips (semi Sweet Is Fine Too)
Preparation
1. First, in a food processor add your peanuts and pulse until finely chopped. You will want pieces ranging from tiny to the size of peas. Dump peanuts onto a plate and set aside.
2. Next, in your same food processor (no need to clean out the peanut crumbs) add your pitted dates. Process until dates chop up and form into a ball. This will take about 15-17 seconds.
3. Into your processor, add your cocoa powder, coconut oil, and peanut butter and process again until fully combined. You may need to open up the lid and break ball apart with your fingers a bit before mixing, to help the incorporation along. Scrape down the sides of the processor bowl if needed.
4. Next, add your chocolate chips and reserved peanuts. Mix well in the processor until fully combined, roughly another 20-25 seconds. Mixture should clump together easily when pressed between your fingers.
5. Dump mixture onto wax or parchment paper and form into a ball, pressing tightly. Cover ball with other sheet of parchment/wax paper and roll it out with a rolling pin. You will want your disk’s thickness to be about 1/2″.
6. With a pizza cutter (or knife) cut disk into as many 3″x1.5″ rectangles as you can. The excess scraps can most definitely be re-rolled and re-cut! So keep going until all of your mixture has been made into 3″x1.5″ bars!
7. Wrap each bar in a strip of wax or parchment paper and store in an airtight container in the fridge! The heat of your hands can soften the dough dramatically when working with it, but fret not, the fridge will set those bars up perfectly.
Note: Once bars have had time to set up in the fridge (an hour or more), remove as needed for a snack (are totally OK out in room temperature). I suggest leaving bars in fridge until needed. Then, even if you’re taking a few for a road trip or picnic outdoors, they should be fine at room temp. Stay away from high temperatures though.
Makes 14-16 bars.


