Description
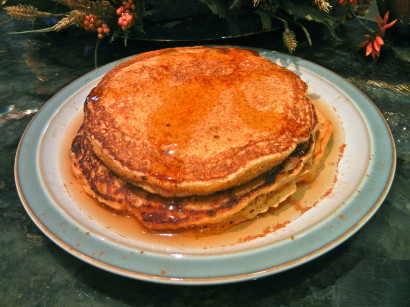
Fluffy and delicious … oh, and healthy, too!
Ingredients
- 2 pounds Butternut Squash (a 2 Pound Squash Yields About 2 Cups Cooked)
- 2 Egg Whites
- 1 teaspoon Muscovado Or Brown Sugar
- ½ cups Low Fat Milk
- 1-½ cup Whole Wheat Pastry Flour
- 2 teaspoons Baking Powder
- 1 teaspoon Ground Cinnamon, Plus Extra To Sprinkle On Top Before Devouring!
- ¼ teaspoons Ground Cloves
- ½ teaspoons Fine Sea Salt
- 2 Tablespoons Butter (I Prefer The Salted Kind) For Greasing The Pan
Preparation
Cut the butternut squash in half length-wise to create two somewhat symmetrical pieces. With a metal spoon, scoop out the seeds and stringy stuff. These guts can be tossed.
Next we need to cook the squash. There are two ways I typically go about it: Either roast the squash flesh/cut side down on foil lined cookie sheet at 350 F for 45 minutes. Or if you’re in a time crunch, you can put the squash flesh side down on a flat plate and cook in the microwave on high for 9 to 10 minutes.
Set the squash aside and allow the butternut squash to cool somewhat.
In the meantime, in a large bowl, mix together the egg whites, brown sugar and milk.
In a separate medium sized bowl, combine the dry ingredients: flour, baking powder, cinnamon, cloves, and sea salt.
Once the squash is cool enough to handle, scoop out 2 cups worth of the soft, cooked flesh and place in a large mixing bowl. Save any leftover squash in a Tupperware container for up to 5 days. (It’s delicious as a side dish for lunch or dinner.) Discard the skins.
Now we need to transform the squash into a nice and smooth consistency. Either mash well with a fork or place in a food processor or blender. If you choose the latter, transfer the pureed squash back into the large sized bowl once processed.
Add the wet ingredients to the squash mixture and stir until just combined. Now add the dry ingredients to the squash mixture and stir that up, as well.
Take one tablespoon of butter and heat it in a skillet, preferably a black, old school, cast iron skillet, but any skillet will do.
Once the butter is melted, check to make sure the fire is not blasting. Medium to low heat is preferred to ensure even cooking.
Time to cook up these cakes! Use a 1/2 cup to measure out the batter for each pancake. Once the batter has been poured into the skillet, take the back of a metal spoon and gently graze the surface of the pancake to slightly increase it’s diameter and smooth the top. Remember to wait until bubbles start to form on the surface and the edges go from shiny and gooey to matte and firm before flipping. Then flip and cook the other side. When done, remove the cooked pancakes to a plate and repeat with the remaining batter.
After the 3rd pancake, add the remaining tablespoon of butter to the pan to melt before cooking the remaining cakes.
Sprinkle ground cinnamon on top of your stack o’ pancakes.
Lastly, choose your topping(s)! I recommend any (but not all) of the following: honey, 100% maple syrup, organic agave nectar, butter, yogurt, chopped walnuts and/or pecans. Important: These toppings are not included in the calorie and nutrition facts provided, so please read labels and measure out portions!
Enjoy!
Nutrition Facts:
Serving Size: 2 – Six inch pancakes
Amount Per Serving
Calories 300
Total Fat 4 g
Sodium 558 mg
Sugar 6g
Total Carbohydrate 56 g
Protein 10 g


