Description
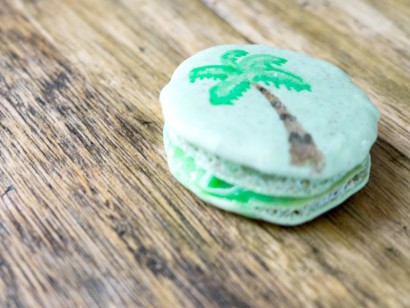
Sweetness that melts on your tongue and gives way to the fragrance of coconut with a bite of lime. If I was stranded on a deserted island, I’d pick these meringues as the perfect companions.
Ingredients
- ⅔ cups Almond Meal
- 1-½ cup Powdered Sugar
- 3 Large Egg Whites, Room Temperature
- 5 Tablespoons Granulated Sugar
- 1 teaspoon Vanilla Extract
- FOR THE LIME BUTTERCREAM:
- 8 ounces, weight Cream Cheese
- ½ cups Powdered Sugar
- 3 Key Limes, All The Zest And 2/3 The Juice
- FOR THE LIME CURD:
- 3 Eggs
- ¾ cups Granulated Sugar
- ¼ cups Key Lime Juice
- 1 teaspoon Key Lime Zest
- 1 drop Concentrated Gel Green Food Coloring
- 4 Tablespoons Butter
Preparation
Preheat oven to 280ºF and position 2 racks in the lower section of the oven. Line 2 rimmed baking sheets with parchment paper. If you have time, draw 1-inch circles on the back of each sheet, spacing the circles at least 1/2-inch apart.
If your almond meal is very coarse, grind it with the powdered sugar in a food processor until fine. Sift almond meal-powdered sugar mixture twice through a mesh sieve.
Place egg whites in the bowl of a stand mixer (or use a hand mixer), and begin to beat on medium-high. When eggs are frothy, gradually add granulated sugar 1 tablespoon at a time until fully incorporated. Continue to beat the egg white mixture until glossy and stiff peaks form when you lift the beaters. Gently stir in the vanilla extract. Be careful to not over-beat the meringue (i.e. the meringue takes on a clumpy texture).
Add half of the sifted almond mixture, and gently fold it into the meringue using a flexible silicone spatula. Lift from the bottom, up around the sides, and toward the middle, being careful to not over-agitate the meringue and lose too much air. Once the almond mixture is predominantly incorporated, add the second half and repeat the folding motion.
When the almond mixture is just incorporated, you will need to transform the batter into the appropriate texture. Using the flat of the spatula, “punch” down into the center of the batter, then scrape more batter from the sides to the center, and punch again. You will need to repeat this 10-15 times (or more, depending on your arm strength and the beginning texture of your batter) until the batter slowly and continuously drips back into the bowl when you scoop it up with the spatula. Think of the consistency of molten lava. For the best results, punch the batter a few times, check the consistency, then punch a few more times, etc. Do not make the batter too runny or the meringues won’t rise as they should, and you could end up with oil stains on the surface.
Pour batter into a pastry bag fitted with a 0.4-inch tip. In a pinch, you can also use a gallon-size resealable bag: just snip a teeny bit from one of the bottom corners. Twist and clip the top of the bag to avoid overflow. On your prepared baking sheets, pipe out 1-inch rounds in the circles you drew (remember to draw the circles on the back side of your parchment to avoid ink or pencil stains on your meringues!).
Holding the baking sheet in both hands, rap each baking sheet firmly on the counter two or three times. This smooths out the tops and helps form the “pied” or frilly foot on the bottoms of the meringues. Allow the piped meringues to dry, uncovered, for at least 15 minutes. The meringues should form a very thin, smooth crust where, if you tap it lightly with your finger, the batter will not stick to your finger. If after 15 minutes, the batter is still sticky, let it dry longer. This may take up to an hour on humid days.
Place both baking sheets in the oven and bake for 15–18 minutes. After the first 2 minutes, open the oven to allow any excess humidity to escape. Halfway through, swap oven racks and rotate the sheets for even baking. The meringues are done when they are baked all the way through and the shells are just hard. Take care to not under-bake (insides will still be mushy) or over-bake (tops will begin to brown). Remove them from the oven, and cool on baking sheet placed on a wire rack.
When fully cooled, assemble the meringues with your choice of filling. The assembled meringues can be stored in an airtight container in the refrigerator for up to one week.
For the lime buttercream:
Beat cream cheese with a stand or hand mixer until completely smooth. Add the powdered sugar and mix until completely incorporated.
Add lime juice and zest and mix. Taste and adjust lime if desired.
For the lime curd:
In a saucepan, whisk together the eggs and sugar until well combined. Whisk in the key lime juice, zest, and gel food coloring (I used the tiniest tip of a toothpick of gel, just to give the curd a subtle green tint. Completely optional. If you don’t use, the curd will be a creamy yellow with flecks of green from the zest).
Turn the heat on to medium low and stir the mixture briskly and constantly until warmed through. Add the butter a little at a time until it melts into the mixture and becomes smooth. Continue cooking and stirring until the curd begins to thicken and coat the spoon. Pour the curd through a fine mesh sieve to strain. Pour curd into a jar or other tightly sealed container and refrigerate up to 2 weeks.
To assemble and decorate:
Pipe frosting onto half the cookies, sandwich with another cookie. Brush the tops with warm water and sprinkle with toasted coconut. Alternatively, you can slather a cookie with lime curd, sprinkle with coconut, and top with another cookie. Instead of coconut dusted tops, you can paint designs on your meringues with a simple small paintbrush and some watered down food coloring. The possibilities for these pictures of imperfection are endless.